StromTrooper banner

Starter Relay testing

24K views 67 replies 9 participants last post by  Rolex  
#1 ·
Earlier today I posted about mixing oil. A neighbor commented with my moto on the side stand the oil sight glass didn't show any oil. I said the bike had oil, and on the side stand it wasn't registering. I left home and stopping to top off but then the engine wouldn't crank--press button and no noise. Looking at the instrument panel, the oil lamp was lit and I mistakenly thought there was an oil sensor which wouldn't let me motor. So I posted here asking which oil weight available at a gas station, which I might be able to mix. After this post I found a bottle of 5W-40 synthetic and added 500ML (1/2 a quart of oil) but still I couldn't get it to start. I ended up getting a tow. :(

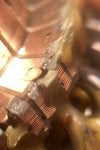
Now, I'm going through the starter system troubleshooting section of the service manual for my 2014. The starter relay passed the continuity test under power, but appears to have failed the coil resistance test. Specification is 3-6 Ohms. but using my multi-meter I get a result between 1.5 -2.5 Ohms--not 3-6.

Image


Am I doing something wrong or is this relay bunk?
And
I was already on the road. So, can another component cause the relay to go bad? The only difference was I was using my power outlet to charge my phone, and this was the first time I was using it. Previously, the 3A fuse was blown when I bought the bike last year. I was leaving for three day trip and thought to use it for the first time.
 
#2 ·
Why are you doing this ?

If the bike won't crank with a good battery start at the clutch switch, join the wires as a bypass then see if the motor cranks.
 
  • Like
Reactions: 2thDr and Marmora
#3 ·
Put your auto mechanic hat on the shelf for a minute and listen to the guys here that know the most common failure points on these bikes and save yourself some time and frustration. @Rolex can help you...

Sent from my Pixel 5a using Tapatalk
 
#4 · (Edited)
"start at the clutch switch, join the wires as a bypass".
I just don't understand these instructions. I get the gist. I can put that in my pocket, but it won't get me through the job.

Here's a thing stuck in my head right now...
I was using the newly recharged battery to test the relays. Being really careful. Everything was laid out on the bench, orderly, plenty of room. Better conditions than standing over my moto. I started with alligator clips on the relay, so I'm not reaching into the relay with a live wire--easy to short. And I still blew the inline 3A fuse on the YUASA cable. So what happens if I'm bypassing wires to start the engine on the bike. Zap. Zap. How do I know I'm not blowing a fuse or damaging a relay when I'm joining those wires? I'm not more experienced with electrical than to know not to short live wires, or to leave testing connections live for very long. Not for nothing, but that sort of freaks me out and has me wanting to check all my fuses and relays after each test of the ignition circuit.

"Put your auto mechanic hat on the shelf"
I get it. The road I'm going down is just replace this, replace that. That's the Service Manual.
But my mechanics hat makes me check screws are seated before I start twisting. I need that hat. hehe

Right now I'm testing each component of the starting system one after the other as per the Service Manual:

PAGE 1I-3
Starting System Symptom Diagnosis (table)
Condition
: Starter Button is not effective
Possible Cause:

  • Run down battery
  • Defective switch contacts
  • Brushes not seating properly on starter motor commutator
  • Defective starter relay or starter interlock switch
  • Defective main fuse
I started with what I thought were the easy things:
  • The battery is YUASA, and not a year old. I used the YUASA trickle charger last night it was topped off in less than an hour. I haven't reconnected it to the bike yet.
  • All the fuses look good.
  • I checked the Starter Relay as described above. Related, I checked the Side Stand Relay for continuity. That's good.
I would be surprised if the brushes on the stater motor are in play at only 13k total miles on the bike. That leaves switches, and whatever an interlock switch is--see page globby bla. haha.
 
#5 ·
See post #33 Help me chase down a electrical draw ?

Be aware of several things, see in the photo below pointing to the two terminals-connect a meter set at VDC to your battery, post before VDC and then following my post #33 you are shorting out the start solenoid for 5 second intervals NO KEY ON
Image

I don't know if this is your diagram but if the starter meets my specs in post #33 THEN YOU NEED TO USE YOUR METER AND WORK BACKWARDS ACCORDING TO THE DIAGRAM BELOW, PROVIDED THAT IS YOUR CIRCUIT--also it appears you MUST use the clutch to start

Image
 
  • Like
Reactions: SnoPro753 and Gert
#6 ·
The clutch switch is the most likely problem when a motor will not crank and you have no warnings on the dash.

There is 2 wires at the clutch switch you need to join them together, you can't leave them permanently joined but you can to test the system.

The clutch switch on your bike is very open and the contacts can be cleaned if that is the problem.

I have said this thousands of times if you have a neutral light you can forget the stand switch it will not stop the bike cranking. (& would throw a CHEC on the dash)

Bridging the 2 main cables on your starter relay should start the bike, there will be a few sparks but the bike should run, this will test your battery and starter motor.
 
#7 ·
".. in the photo below pointing to the two terminals-connect a meter set at VDC to your battery, post before VDC..."
??
I see four terminals indicated by the illustration: A, B and Positive, Negative (indicated by the meter testing probes). So, connect the voltmeter to the battery--which post of the battery? Positive? and then the negative probe to what?

"...then following my post #33 you are shorting out the start solenoid for 5 second intervals NO KEY ON"
I should short the two terminals (+, --) indicated below and if I connect the meter correctly, then the reading of 11V or more is good, and less means what?
Image


"I don't know if this is your diagram.."

Yes. Only Turn Signal/Side Stand Relay is just Side Stand Relay in my diagram.

"There is 2 wires at the clutch switch you need to join them together.."

So short the two wires as indicated (red), and start the bike? I would guess I can also test the switch for continuity (blue) yes?

Image


"Bridging the 2 main cables on your starter relay should start the bike"
By "2 main cables" you mean the positive and negative terminals in my diagram above?
 
#8 ·
"There is 2 wires at the clutch switch you need to join them together.."

So short the two wires as indicated (red), and start the bike? I would guess I can also test the switch for continuity (blue) yes?

View attachment 302122

"Bridging the 2 main cables on your starter relay should start the bike"
By "2 main cables" you mean the positive and negative terminals in my diagram above?
Take diagram 1 first.

You have them labelled in red as positive & negative but they are both positive, yes if you use something like spanner to bridge those bolts with the ignition on the bike should start.

It will bypass everything so it will just test your battery and the starter motor so they can be ruled in or out.

Diagram 2

Yes this is to test the switch circled in blue, that switch is a weak point so should be tested first, replace your red line with a wire and see if the motor will crank.

If it will that switch is your your problem. it can be cleaned & that can help but you should buy a replacement and keep it handy for future problems.

You should also ensure your clutch lever is manipulating that switch that could be the issue ?

You can ride the bike with it bypassed but it's not recommended for ant length of time.

A word of caution, the switch is held in place by a JIS screw not a phillips head (jap bikes don't use phillips head screws) you should use a JIS driver on this screw to avoid stripping the head and causing more problems.
 
#10 ·
You don't need the plug in to crank the bike, it won't start but it should crank.

If it will not crank with those bolts bridged it is your battery, battery cables or the starter motor. in that order.

What is the battery voltage.

Are you sure your battery cables are clean and tight, they do work loose on bikes.

Check the battery terminals.

The terminal at the starter motor.

Follow the negative cable down from the battery to the bolt on the motor and ensure it is clean and tight.
 
#11 ·
"What is the battery voltage."
12.93

"Are you sure your battery cables are clean and tight, they do work loose on bikes."
Yes.

"Check the battery terminals."

Clean & tight

"The terminal at the starter motor."
connected and undamaged

"...negative cable down from the battery to the bolt on the motor and ensure it is clean and tight."
Clean and continuity test passed


AND..
I shorted the clutch switch, then tried the start button. Nothing happened but clicking on the relay.

THEN
With ignition in OFF position, I shorted the relay screw terminals. I had an unused power cable. I connected the wires with tape and used the insulated plug's prongs to short the two Screw Terminals. Nothing. No sound.

SO,
I read the beginning of the starter motor troubleshooting post here My starter motor troubleshooting guide. As per the first three tests of the post--with the ignition set to ON, I get lights, and humming sound where the fuel pump should be, and no CHECK on the instrument panel.

So, I guess the next thing to do is further examine the wires to the starter and then inspect the starter motor.
For the latter, I have the Service Manual which describes in detail the Disassembly of the Starter Motor.

Any suggestions short of disassembly?
If I conclude its the starter motor, is the result just to buy a new starter (~$450)??

Image

Image

Image
 
#12 ·
Can you get a jumper battery box or a set of jumper cables from a car ?

If you jump the negative terminal straight to the bikes motor then touch the positive cable to the power cable bolt on the starter motor.

The starter should spin.

I'm expecting it will not as this is the same as bridging the two bolts on the starter relay so you should get the same result.

Just sparks no movement.

That is a test of the starter motor, you can hit the starter motor with a hammer and try again.

If you need to disassemble the starter motor mark the position of each end before you start, this is not just a strom thing it goes for all starters and alternators.
 
#13 · (Edited)
“If you need to disassemble the starter motor mark the position of each end ...”

The position of what? Something is easy to get flipped end-over-end and not fit?

I have the Yuasa connector for the trickle charger. I connected it to the trickle charger plug installed on the bike. After testing the starter, and checking the voltage, I realized using this cable flips the polarity.

I performed the test again as instructed. No spin starter. (this seems crazy for 13k moto, but what do I know.)

As I said, I corrected the wiring error and tested the positive terminal on the starter screw terminal. No go.

I gave the housing a few good smacks along the housing cylinder. Still no go. Finally, I tested my voltage, and it was good (12.9v)

Provided this test is foolproof, then the starter is bunk as demonstrated

Image

NOTE the black lead to the engine is actually positive—by mistake. This photo shows where I placed the clamp on the engine. But the color (black) should be the red connector—which was negative in this instance. Connecting together two Yuasa adapters for the CHARGER to the BATTERY, flips the polarity—red to black and black to red. DOAH!

Image
 
#14 ·
A couple things, taking the starter apart is a last resort. As to marking, use a scribe, a mark extending from the stator to the end bell and a double scribe on the shaft end the same way. The position of the wired end usually is where the brush holder is. The orientation of this end bell is critical to the position of the permanent magnetic field and armature. Many have a dowel pin to make it impossible to assemble incorrectly.
 
#15 ·
Looks like you have the starter out. A bit of advice, take some photos of the brushes and brush box. A common problem is brushes sticking in the brush box or twisted pigtail connections, which restrict brush travel.
 
#16 · (Edited)
“…taking the starter apart is a last resort.”

As I said last post, if the jump cable to the starter is foolproof & reliable test, then what is the conclusion other than the starter is bad. Maybe multiple components are bad (starter relay as I tested it in OP), but this test—if I understand it’s import, is intended to determine a bad starter.

“As to marking, use a scribe, a mark extending from the stator to the end bell.”

I don’t know these features. I have the Service Manual pages, and a stator and end bell are not labeled components or features. It must be a common terminology I'm just not heard before? Would you rephrase your marking instructions using the terms from the illustration? Or, define your terms with the equivalents in the diagram?

Alternatively, I’ve shown the disassembly instructions which does make a note about alignment of brush holder with the starter case. Reading those instructions, do you find them insufficient in a particular step?
Image

Image


I think after an aborted 3-day fly fishing trip to the Catskills, NY, I'm up for some starter disassembly. I will surely take photos.
 
#17 ·
I am on my android phone, tiny scree and no patience going through the thread. Did you connect using booster cables, red to positive of a car or good battery, negative to the case of the starter? If you did and nothing happened then disassembly is next.
As to marking, I see it is almost impossible to put this together wrong.Also they explain about the protrusion for the brush holder.
This starter draws roughly 50 amp. It is possible a brush is stuck. It may also have a heavy copper pigtail off the brush. Improper installation could be the issue. There is a good chance the armature is pitted. Take some good photos and post them, minor pitting can be corrected using 200 grit garnet sand paper. Like I said post some photos. I rebuilt lift truck motors for a living, working in a electric motor shop - I still have com seater.

FYI if hooking to a car battery or any other battery as in bench testing, DO NOT RUN MORE THAN 1 second, the armature will run away as it isn't under a load, more than 1 second and the RPM could exceed safe operating and have the windings come out of the slots from centrifugal force.
 
#18 ·
Draw a line from one end of the starter to the other then draw a second line but only go halfway.

It is so each end will go back on in the same position as it came off, they can be spun around, if you get your lines right the assembly must be right.

It looks like you have used a SAE plug to test your starter, 2 things, the cables may not carry enough juice to spin the starter and if you have a fuse in the line that fuse will most likely have popped so you will have no power.

Try doing the test again with bigger cables if you can.

Distance traveled should have no bearing on the starter motor, how often the starter is operated and the way it is operated will play a bigger part.

When the oil is cold never start the bike while in gear, there will be a heap of extra drag on the starter and a poorly adjusted clutch can also do that when the oil is hot.
 
  • Like
Reactions: InverterMan
#19 ·
Draw a line from one end of the starter to the other then draw a second line but only go halfway.

It is so each end will go back on in the same position as it came off, they can be spun around, if you get your lines right the assembly must be right.

It looks like you have used a SAE plug to test your starter, 2 things, the cables may not carry enough juice to spin the starter and if you have a fuse in the line that fuse will most likely have popped so you will have no power.

Try doing the test again with bigger cables if you can.

Distance traveled should have no bearing on the starter motor, how often the starter is operated and the way it is operated will play a bigger part.

When the oil is cold never start the bike while in gear, there will be a heap of extra drag on the starter and a poorly adjusted clutch can also do that when the oil is hot.
[/QUOT
Yes 50 amp, not sure how he tested it. The drawing he posted shows a protrusion from the stator, so brush end end bell won't work on the drive end. The through bolts are recessed into the stator. I would use a scratch awl , a double line for drive end and single for opposite drive end. If the motor was being rewound, we would use a center punch two punches in the drive end bell and matching on the stator. Some of us used triple for idle or opposite drive end, as the V formation would line up. This was done for two reasons, sometimes it had been rewound before, and assembled incorrectly.
Anyway waiting to see what turns up.
 
#20 · (Edited)
"..2 things, the cables may not carry enough juice to spin the starter and if you have a fuse in the line that fuse will most likely have popped so you will have no power."

You can be sure I fet the same way.
I connected the negative to the engine and the positive to the screw terminal on the starter and nothing happened. So the very next thing I did was test the voltage on the ends of the clamps--that's what you seen in the picture with the multi-meter. That's my hand reaching to the engine block where I clipped in the negative lead, and the other clamp on the positive lead--12.94V. I didn't pop that 3A fusticator.

Here I marked the starter as instructed. Let me know if this is NOT correct :)

UPDATE:
Also, for shits and giggles, I annotated the other tests I performed following the Service Manual in a diagram of the starting system. (NOTE, my notes will likely only make sense if you're following along on the same pages which I've indicated with each title from the Service Manual). I indicated with RED text the failed test on the Starter Relay. And, in BLUE are weird results: Some because I made some mistakes (Side Stand Ignition Interlock Voltage Test), or because I don't understand how to test volts on a diode, or yet others because I don't see how to test the coupled connector (Gear Position Switch).

After this I will create a new post, with links to this history. I will post photos of the disassembled starter with the results of the Service Manual tests. Thanks for getting me here peeps.

Image

Image
 
#21 ·
There is no way that fuse should have survived if you did that test properly.

It's best to put the negative on the starter motor then touch the positive to the bolt were the battery cable was secured.

It must at least spark but it should spin the starter too.
 
  • Love
Reactions: InverterMan
#22 ·
It is a rare thing , but I had my denali air horn compressor do the same thing. I took it apart and discovered that water could get into the brush holder, just enough to corrode and the brush was stuck. Cleaned everything up and re assembled and used some silicone to seal it .
 
#24 ·
The very first thing should be using a ohm meter. Between the positive stud and steel stator, with all the above comments from the OP I would assume infinity. Next using a ohm meter connected, slowly turn the output shaft. It is possible to have some open connections on the commutator , but also to have a stuck brush and out of round com. Since the starter has been removed, applying power instead of using a meter is the wrong direction to go in. IMHO.
 
#25 ·
Being this close, taking it apart with two through bolts, is like 10 more minutes. If I totaled all the posts since the OP posted in time spent. I could have pulled the starter apart, replaced the bearings, machined the commutator and replaced the brushes and re assembled . The bike would be running now.
 
  • Like
Reactions: Marmora
#26 · (Edited)
"If I totaled all the posts since the OP posted in time spent."

It's not the number of posts, it's the mileage. Think of where we started. Jump the diggly bop with a dooobly bo and wait for zap-zap. And now we got diagrams, and videos, and measurements--all things the internet is good for. The internet would be fantastic if I could post about my issue and you could get the bike running in 10 minutes. Hehe

Mean while I look for jumper cables (three neighbors don't have 'em), here is a video where I blow a 7.5A fuse trying it with what I got. jump on starter

UPDATE:
It's difficult to focus on work thinking about fixing my VEE. Is the stator something you see after you take the starter apart? Do I have access from the sealed starter? I don't know what the frack I'm doing here--freely admit. Here is another video of me putting the multimeter set to ohms positive on the terminal and negative on the rotor--but that's not the stator, right?

Also, the battery is at 12.89V after these zap-zaps to try to move it. Not bad.
 
#37 ·
That video is perfect-you are rotating the armature and even your polarity is correct. You need to take the starter apart---all the tests previous have confirmed you have either open connections on the armature or stuck brushes

I am not sure what the delay is, but you need to fix the starter motor first, or replace it. My money says stuck brushes.
One thing, take the brush end apart very carefully, as to the armature, best to be also careful in removing it, the permanent magnets will be holding it back. One thing, don't drop it or hit it with a hammer, which could damage the magnets.
 
#27 ·
You won't get the starter to spin if you have a fuse in the system the load is just too big even with a good starter and it could be even bigger if the starter is bad.

You can try this, go to your kitchen and get a fork (yes the type you eat your food with) with some manipulation you should be able to replace the fuse with the fork then try your test again.
 
#29 · (Edited)
Other than some abnormal wear to the plastic coating on the coil near the commutator (as shown below) there is no visible damage. I don't see evidence of moisture, but plenty of carbon dust and a few pieces of that yellow plastic fell out.

On the popular OEM sites I don't see they sell the coil & commutator as a separate part. It's the whole starter for $425.
Or, I could maybe needle file off the flaked/chunked bits like a dentist scraping plaque and mix some JB Weld??

Either way, I think I should put this back into the bike and keep looking for problems, because I'm not feeling this is bunk.

  • Passed the zap starter test and the starter spindle spun (see previous thread, link below).
  • Battery, despite all the zaps, was still at 12.85V
  • Starter Relay has continuity under power, but was out of spec in the other test (see previous thread, link below).
  • Clutch Switch jump didn't resolve the issue.
Anyway, few more I could test I'm sure, but running out of places to check. Sure its going to be the last thing.

Image


Image


Video 0:53

Starter Motor Inspection (1I-7)
  • Carbon Brush
    • Abnormal wear, cracks, smoothness in the brush holder - Nothing I would recognize, but what the heck is smoothness? These brushes look like teeth of a tobacco pipe smoker
    • Brush Length Service limit: 6.5mm - all brushes at 12mm
  • Commutator
    • Discoloration, abnormal wear, or undercut (between segments) - discoloration, undercut present as far as I can get my fingernail between each segment
  • Armature Coil
    • Using multi-meter measure
      • Continuity between each segment - PASS
      • No continuity between segments and shaft - PASS
  • Bearing
    • Smooth rotation - PASS
  • Oil Seal
    • Damage - No visible damage
NOTE: This post is preceded by another on the Starter Relay Testing and other stater related testing procedures.
 

Attachments