StromTrooper banner

Custom Built Wind Shield

2.8K views 14 replies 12 participants last post by  WNCSte  
#1 · (Edited)
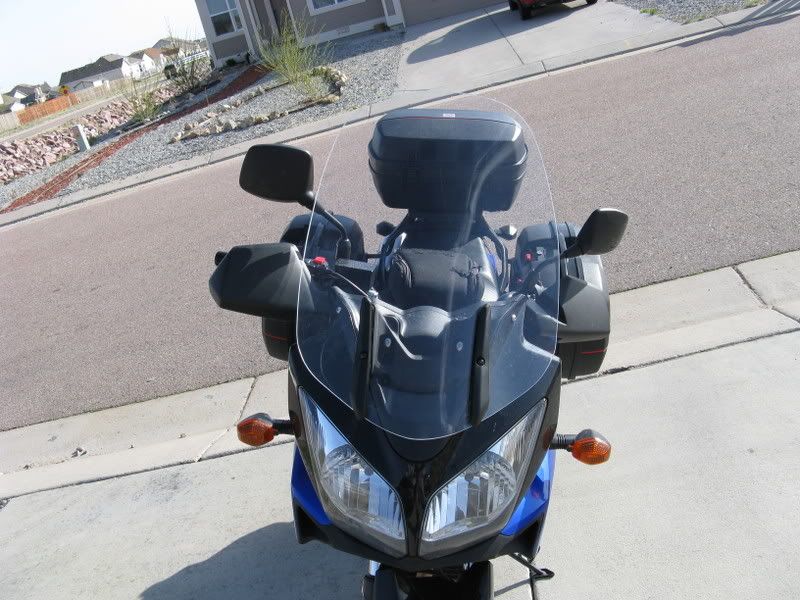
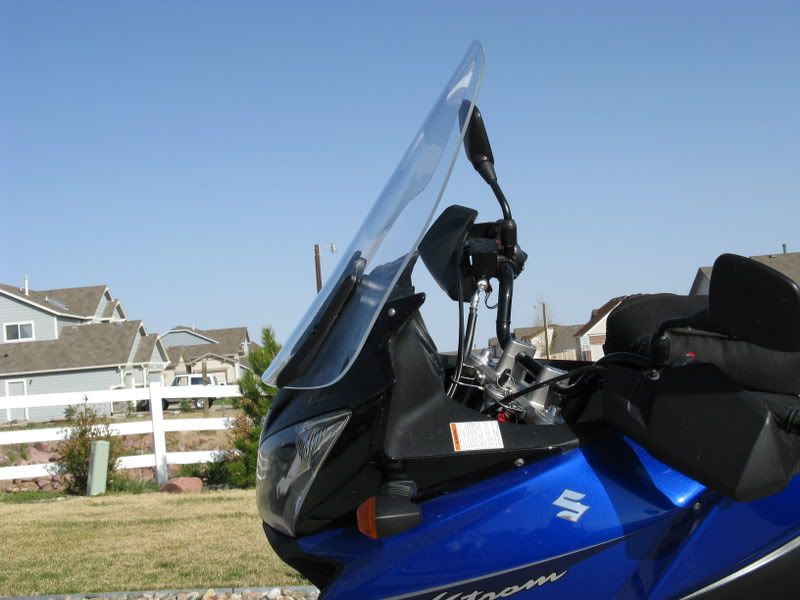
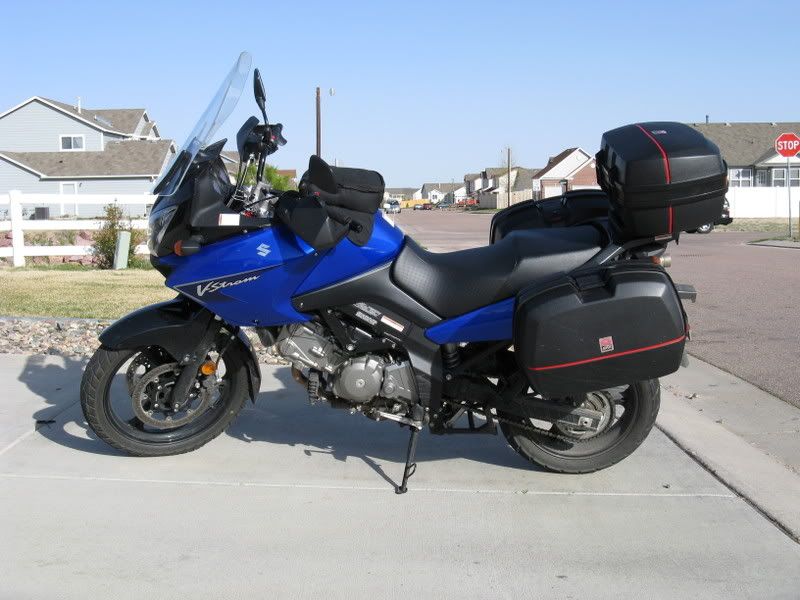
Just got tired of the buffeting with the stock shield and am too cheap to pay $200 to CalSci.....

So I build my own. $13 for the material at HomeDepot.

Used my wife's plates and bowles and a ruler to trace the shape. Cut it with a fine toothed blade on a jig saw. Used a sander to smooth everything out. Kitchen oven on middle rack and 'broil' setting, flipping every 2 minutes....for about 5-6 minutes (don't forget to put cardboard underneath).....before shaping over an Iglo, 5 gallon water jug. Standard drill bit to drill the holes.....

Turned out pretty awesome and the buffeting is all but gone.....(I need to do something different about the mirrors)

Here's some pics.....

Image


Image


Image
 
#3 ·
Yeah, nice job! What is the material -- acrylic, lexan?
 
#5 ·
That looks really nice.

I made one (from lexan) but didn't try to bend it using heat. It worked (i.e. didn't break while bending) but I had a heck of a time linning up the holes. I can see how bending it would make that part much easier. I had to kinda guess where they should be and ended up having to enlarge them too much. I just used some fender washers and it worked but yours looks nicer.

I need to try this again.
 
#6 ·
That's a 2 thumbs up, very sano job! and I like the shape. I'm assuming there's a shorty version too! let me see.........where did i put that water jug???
 
#7 ·
My first attempt was with the thin Lexan. That was a disaster, because every time I climbed above 60 mph, the shield would bend back.

This is the thicker, acrylic material and it came out beautiful.

As for helping out......
Sorry, but can't build more.....barely have time to do my own stuff.

But here is a drilling recommendation that I learned off another site..... Measure and only drill the two holes for the plastic guides. Once the shield is placed on the mount, then you can easily 'sharpie mark' the other 6 holes and drill them. This is really important, as it will help you see and understand the angle at which the hole needs to be drilled. Sounds complicated, but is really a 10 minute job and pretty easy. (ps...I also drill the holes first with a much smaller drill....then went to the larger drill for final size.)
 
#8 ·
That looks great! What are the height and width measurements? I'd like to attempt this. Any suggestions?

Thanks for the post. Again nice job.
 
#10 ·
I went as wide and as high as the piece would allow. I can't remember the dimensions of the stock piece....but it is as Home Depot sells it....maybe 24" x ????...

Honestly, I was able to trace and measure the pattern with a simple ruler and different sized bowls and plates. Just play with the shape you want.